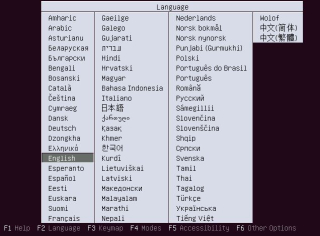
1) Instalasi Windows Server 2003 :
· o> Atur dulu BIOS,first bootnya CD ROM
· o> Masukkan CD Windows Server 2003 lalu
Tekan F10 lalu “yes”
· o>Lalu tekan angka
9 untuk instalasi windows server standar
· o> Setelah
pengecekan file sudah lalu enter
· o> Lalu diminta
untuk resart komputer itu di diamkan saja
· o> Kemudian akan
masuk pada penginstalan
· o>Masukan
administratornya lalu next
· o>Pilih waktu dan
tempatnya misal hanoi bangkok indonesia lalu next
· o> Password tidak diisi
· o>Tunggu hingga
proses instalasi selesai kemudian keluarkan CD Windows Server 2003 dari CD ROM
2) Installasi Driver
Setelah
melakukan instalasi driver tinggal melakukan pengisian kofigurasi IP
3) Konfigurasi IP Address
· Setting IP pada LAN Client :
IP ADRESS : 192.168.38.2
Netmask :
255.255.255.0
Gateway : 192.168.38.1
` DNS 1 : 192.168.38.1
DNS 2 : 8.8.8.8
· Seting IP pada LAN Server:
IP ADRESS : 192.168.38.1
Netmask :
255.255.255.0
· Seting ip pada
WAN Server:
IP ADRESS : 100.100.100.38
Netmask :
255.255.255.0
Gateway :
100.100.100.1
` DNS 1 : 100.100.100.1
DNS 2 : 8.8.8.8
4) ROUTING :
-klik star,lalu
administrative tools
-routing
and remote access
-klik
kanan KLOMPOK8-tius (local)
-pilih
configure and enable routing and remote access
-klik next
-klik Network Address Translation (NAT)
-klik next
-klik use this public interface to connect to the internet
-centang pada ”Enable Security on The Selected Interface
by Setting up basic
5) Setting DHCP
* Instalasi DHCP Server :
§
klik Start --> Control Panel
--> Add --> Remove Program
§
klik Add-- > Remove
Windows Component
§
pilih Networking Service -->
Details
§
centang Dynamic Host
Configuration Protocol (DHCP > ok)
§
proses instalasi -->
selesai --> finish
* Konfigurasi DHCP Server :
Client tidak perlu membuat
IP , nanti akan didistribusikan DHCP Server.
-Membuat Scope :
Ø
buka DHCP : Start-- >
Administrative Tools --> DHCP
Ø
klik kanan
klompok8-tius.shome.net [192.168.38.1] --> New Scope --> Wizard klik Next
Ø
masuk ke New Scope Wizard
isi :
o
Name : LAN
o
Description : DHCP internal
LAN > next
Ø
beri nama server :
Ø
Start IP Address :
192.168.38.2
Ø
End IP Address : 192.168.38.15
Lalu next
Ø
membuat Scope diluar scope
ini :
Start IP Address : 192.168.43.5 End IP Address : 192.168.44.10
Lalu Add
+ Lease Duration > Next
+ pilih Yes
, I want to configure these options row > next
+ pilih Yes
, I want to configure these options row > next
Lalu
finish
*Konfigurasi DHCP Client :
- Start --> Control Panel --> Network Connection -->
LAN --> klik kanan Properties --> TCP/IP --> pilih Obtion an IP
Address Autocimally & Obtion an DNS Server Address Autocimally
- lakukan perubahan :
Start --> All program --> Administrative Tools -->
DHCP --> klik kanan pada klompok8-tius --> Properties --> rubah nilai
Conflict Detection menjadi 2-- > Ok .
Tes dari Server :
+ buka Command Promp >
ketik ipconfig/all > ipconfig/release > ipconfig/renew .
+ IP Address client sudah
ada ; 192.168.38.2
5) Setting AD (Active Directory) :
-
Klik
Start > Run > ketik dcpromo > Ok .
-
Muncul
Active Directory > next > next > pilih opsi pertama : Domain
Controller a New Domain > Next >
pilih opsi pertama
-
Windows
2003 akan mengecek DNS Server > pilih
No , just install and configure DNS on
this computer > next
-
Masukkan
nama domain : tius.com
> Next > tius >
-
Next -->
next -- >
letakkan lokasi database untuk Active irectory dan file Log Active Directory
secara default di Directory C : \Windows\NTDS
-->
Next -->
pilih opsi pertama -->
Next -->
masukkan Password Active Directory :
tkj123 , tkj123 > next > next > tunggu sampai selesai > Finish .
6)Firewall
-klik next
-klik finish
-pilih routing and remote access
-pilih routing and remote access help
-klik network interface


